
Baked A Rhubarb Pie From Scratch
Rhubarb pie is my favorite dessert. Rhubarb has a unique tartness that when combined with a flaky crust and a little bit of sugar tastes absolutely amazing. Now, I’m not much of a baker, but I decided that when it came time for me to do some baking, this was an easy choice.
First, I had to get ingredients. If you haven’t had it or heard of it before, rhubarb is a plant at the grocery store that looks like red celery. I went to the Lucky on Fulton and Masonic on the way home from work to pick up my stuff, only to discover that they didn’t have any rhubarb. The woman working in the produce section said that they don’t get it until the spring. So, I went to Safeway in Diamond Heights. I picked up the rhubarb, unsalted butter, and flour. I should note that the cashier had to ask me what was in my bag. I guess he didn’t know what rhubarb was. The rest of the stuff I had at home.
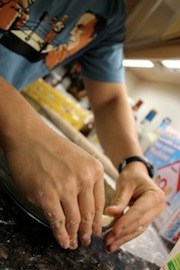
Making the crust was the most difficult part by far. My first attempt was not successful. When mixing it together, I made two mistakes, which I’ll mention later.
First, I mixed flour, cane sugar, and a little salt together. Then I had to cut the butter, which should be cold, into cubes. I put the butter into the flour mixture. Normally, you would use a pastry blender here, but we don’t actually own one. So, I used two butter knives to cut the butter (to the size of peas) into the flour. (Mistake #1: The first time around, I screwed up and didn’t make the butter pieces small enough.)
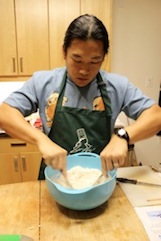

After the butter pieces are small enough, you put ice cold water into the mixture. You stir it in a little bit at a time. (Mistake #2: I put too much water in too fast.) I found out it’s better if you start with 1/4 cup and put in one or two tablespoons at a time. You can start with more, but it’s definitely safer if you do a little at a time. It should look like this when it’s done:

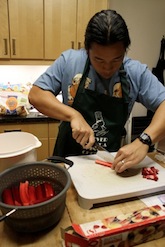
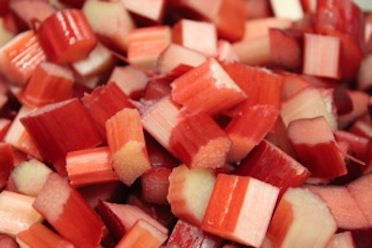
I gathered the dough together and separated it into two sections (one for the top and one for the bottom of the pie). Normally, you’d chill it in the fridge for a few hours, but I threw them in the freezer so it would get cold faster. Then I moved onto the filling. The filling was not too difficult. I washed the rhubarb and cut it into small pieces:
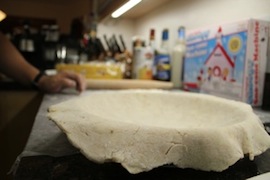
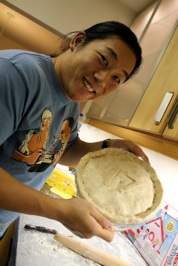
I looked at the recipe and discovered I needed an egg, so I had to make a late run to the store to buy eggs. While I was there, I picked up some ice cream for eating this a la mode. When I got back, I rolled out the dough and put the bottom one in the pie pan:

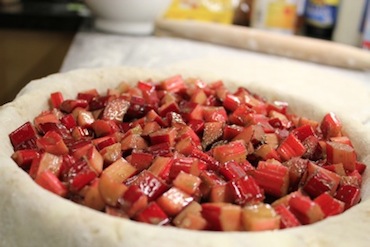
Making the filling was just a matter of putting the four ingredients together: rhubarb, corn starch, sugar, and a slightly beaten egg. I stirred it up until it looked good:


I put the rhubarb filling in the pie pan and spread it out:

I put the top on and sealed the edges together:

I took some excess dough and made a number 17 because it was the 17th day of the year. I baked it for 30 minutes at 425 degrees and then for 15 minutes at 325 degrees.
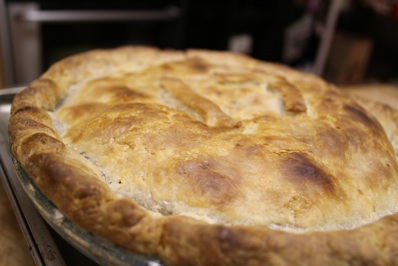
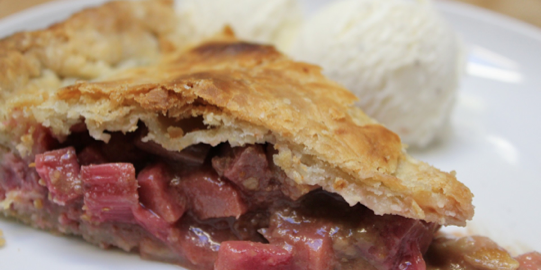
I let it cool overnight and cut a slice in the morning. I was very happy to find out that it turned out delicious!

I know “easy as pie” is a saying, but I didn’t think it was that easy to bake a pie (not the first time anyway). J suggested that maybe they might say that because it doesn’t take too many ingredients. This is true. After all, I used about 7 ingredients for both the crust and the filling combined. Perhaps they meant that it’s easy to EAT the pie. I think that might be the reason because I had no problems with that, especially when it came out so tasty.
Cool Stuff:
Great Rhubarb Recipes
blog comments powered by Disqus